
Cybercrime has been a growing concern for the past two decades. What used to be the task of specialist national police squads has become the routine work of regional and district police departments. Unfortunately, the funding for cybercrime units does not seem to grow as fast as the amounts of digital evidence.
FIREBrick is an open source alternative to commercial hardware write blockers and disk imagers, which can be assembled from off-the shelf mass-produced components for around $199.
Here is a short introductory video about FIREBrick:
FIREBrick features
- Autonomous disk imaging at speeds of up to 5Gb per minute
- Images hashed on-the-fly with verification checks
- Storage disk can be encrypted (via LUKS)
- FireWire write blocker functionality, target drive is visible as a FireWire harddisk
- Portable – fits in a small HTPC case (including display) – MiniITX form factor
- Free, open source firmware
- Can be fully customised to the needs of specific departments
- Adheres to NIST Computer Forensic Tool Testing protocols
- Automatically configured internal storage (none, single disk or RAID)
- RAID mirroring and striping support
- Unlimited configurations – possible development ideas: Android imaging, Kindle imaging, USB imaging, disk image searching… Get involved!!
List of parts
To build a FIREBrick you need:
- ASRock E350M1 Motherboard
- 1Gb DDR3 Desktop RAM (1333 or 1066)
- Dynamode PCIX3FW 3-Port Firewire PCIe card
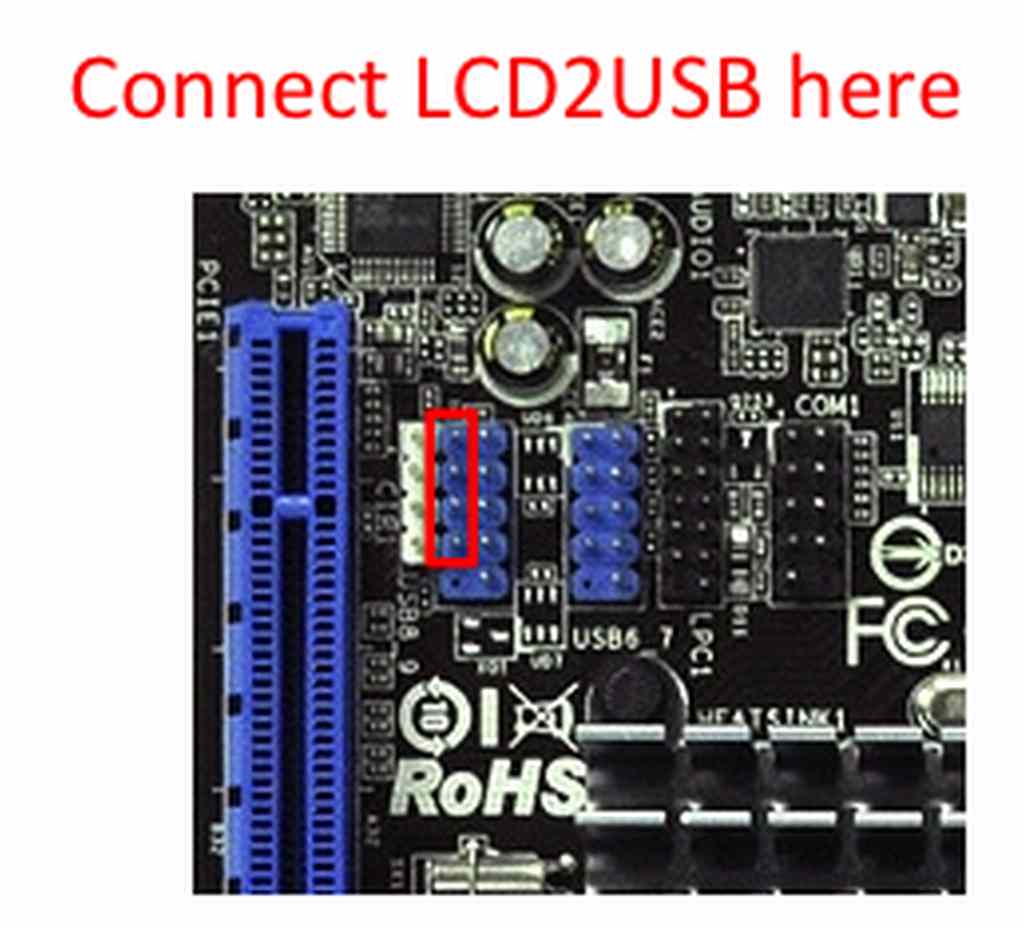
- An LCD2USB 20×4 display (You can buy it from Lcdmodkit or you can make one yourself according to these instructions)
- 120W+ PSU
You will need a case of your choice that fits a mini-ITX (pretty much any case – or even make one yourself!).
If you want internal storage, you will need a SATA HDD. You will need two equal-sized HDDs for internal RAID storage. If you have no storage drives, you can still use the FIREBrick as a writeblocker, if you have a single storage disk you can image to that, if you have 2 storage drives the system will configure them for RAID ( RAID 0 or RAID 1).
FIREBrick Assembly steps:
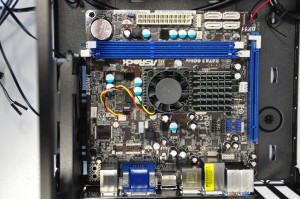
- Attach the motherboard to the case
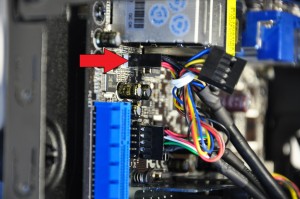
- Connect the Power SW wire to the motherboard
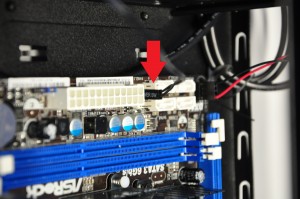
- Connect the Reset SW wires to the motherboard

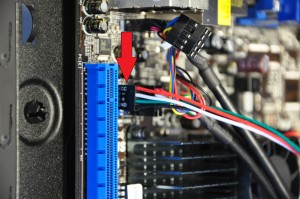
- Connect the HDD wires to the motherboard
- Connect the Power LED header to the motherboard
- Connect the HD Audio wires to the motherboard
- Connect the front LCD Screen wires to the motherboard
- Insert the RAM into the motherboard

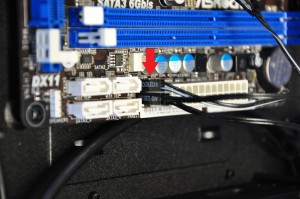
- Connect SATA cables to the motherboard
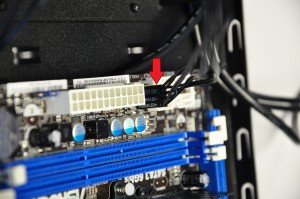
- Put the firewire card into the motherboard PCI-E slot.
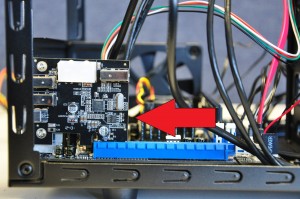
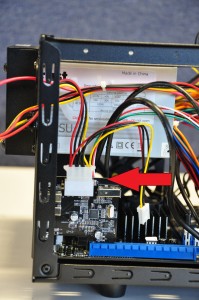
- Connect power supply header to the firewire card. Then connect the power header to the motherboard.
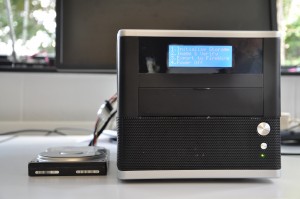
- The finished FIREBrick.

Flashing the FIREBrick BIOS:
Visit https://github.com/leetobin/firebrick for source code, ROM and more instructions.
NEWS!
We’ve just created a new github repo for a new build of the FIREBrick. It uses WiFi.
https://github.com/leetobin/firebrickRemote
Leave a Reply